How to Soundproof a Studio
Mic test… Mic test… okay, when it comes to setting up a home recording studio for music production, podcasting, or other forms of audio work, one key consideration is soundproofing. Do you know how to soundproof a studio? Even if you have the most expensive recording equipment on the market, your audience will be able to identify if you recorded in an unsuitable atmosphere for dealing with sound.
You’ll need to block outside noises from being heard, especially if the noise is coming from a drum, and record if you want to get the most out of your equipment and generate only professional-quality audio. Fortunately, effective sound insulation allows you to keep your noise inside while without bothering your neighbors. So, without further ado, let’s start!


What’s the Difference Between Soundproofing and Acoustic Treatment?
Let us first differentiate these two, because the words soundproofing and acoustic treatment are sometimes used interchangeably, but they have different meanings! The technique of soundproofing involves preventing sound from entering and exiting a place. Controlling reverberations and echoes in order to improve sound quality within a room is referred to as acoustic treatment (more info about soundproofing and acoustic treatment on soundguys.com).
Acoustic panels can be used to minimize reverberations and deflect echoes during the acoustic treatment process to produce an ideal sound recording environment.
So, How to Soundproof a Studio?
As we mentioned before, there are four main methods for soundproofing a room.
- The first is absorption, it’s about adding materials that absorb and trap sound waves.
- The second is damping, it is the process of removing vibrational energy from a structure before it accumulates and produces sound waves.
- The third one is decoupling, it is about creating a barrier between two structures that are in direct touch with one another to prevent sound transmission.
- Lastly, filling the gaps, it’s about filling air spaces in a structure to prevent sound waves from easily passing through.
Now that you’ve familiarized yourself with these methods, we will now incorporate them in soundproofing a studio.
Adding a Mass
The most basic soundproofing strategy is to increase the amount of material inside the room’s perimeter. This thickens and densifies your walls, making it more difficult for sound wave energy to vibrate them. Sound will either be reflected, absorbed into the mass, or both when it reaches a thick barrier. This essentially blocks sound from entering and exiting the room. Here are few things you should do in adding a mass.
1. Build a Denser Wall
If you’re starting from scratch, go with thicker drywall (about 1.6cm) to absorb more sound. To add an extra layer, use a sound isolation barrier or “sheet block” on the interior of the drywall. If you’re merely looking to improve an existing wall, you may use one of these methods:
- Use the sheet block and place it on the exterior of the wall, and cover it with a second (thinner) layer of drywall.
- Make a basic wall frame, connect it to the wall surface, attach it to existing studs, and paint it.
Video: Home Studio Soundproofing: 3 Big Mistakes To Avoid To Reduce Noise – AcousticsInsider.com
2. Add a Padding
Even if you build a denser wall, soundproofing may be improved by adding absorbent panels or foam mats that reduce sounds within the room while simultaneously absorbing sounds from outside. 12”x12” acoustic wedge-style wall panels are popular because they absorb both high and low frequencies effectively.
These foam panels are made to respond to sound in a regulated way, ensuring that you don’t wind up with an acoustically deadened space. They’re usually packaged with adhesive peeling for quick and easy installation on walls and ceilings. Invest in panels with a fiberglass core for the greatest results, since these have excellent sound absorption ratings and are quite durable, and easy to clean (read more about soundproofing materials on silencewiki.com)!
Video: $50 DIY vs $450 PRO Acoustical Panels (Worth It?) – Echo & Sound Proofing
Damping
Even with denser surfaces, vibrations may not be totally dissipated, particularly in the bass area. These vibrations typically move throughout the room on the wooden frame, up the drywalls, and up your mic stands, causing disruptions in your recordings, well, you don’t want that!
1. Green Glue
Green Glue (official website) is currently considered the most efficient damping material available in the market. Green Glue is sandwiched between two solid panels, such as drywall, plywood, or medium-density fiberboard (MDF), using two tubes per 48-foot sheet. You can simply establish a makeshift sound barrier for your studio by taping it to the floor, ceiling, walls, or even the door.
2. Acoustical Glue
Alternatively, you can use acoustical glue. This carefully developed elastic sealant, also known as acoustical caulk adhesive, and may be used to make wall frames and install drywall. It is widely acknowledged as the most effective strategy for reducing noise in a space. It will keep things together while damping bass vibrations if you use enough of it (more about acoustic sealants on soundproofnation.com).
To increase soundproofing, you may also use regular caulk to cover minor cracks, gaps, and seams in and around the walls and windows. Some caulks are water-based or paintable, making them easier to clean and conceal if they don’t match your walls’ color.
Decoupling
When two constructions in your room are directly in contact with one another, sound vibrations from one can easily migrate to the other, aggravating the initial issue. Decoupling is the technique of preventing sound transmission by separating the contact points, which is commonly done with thick, malleable rubber.
When you don’t have the option of knocking down or rebuilding your walls to add insulation and soundproofing materials, this is a great alternative. It’s also useful for getting crisper instrumental sounds in isolated booths with separate microphones. Here’s how to get started with structural decoupling:
1. Build a Floating Floor
If you have space underneath you, you may need to use the same doubling principle for your floors. Instead of dampening glue and drywall, add a drywall layer to create an air gap between the layers. Many people also prefer to “float” the floor by covering it with thick soundproofing mats.
2. Install Isolation Pads
Remember those fantastic studio monitors you bought for your studio? Vibrations that you don’t want to be transmitted through surfaces are easily produced by them. Consider investing in isolation foam pads or a thick rug to lay behind your speakers. Isolation pads are also available for your drum set and other sound equipment that produces vibrations.
3. Build Air Gaps
Whisper clips and channels can be used when your inner wall components don’t meet and you can’t use an acoustic sealant to keep your walls and ceilings together.
The advantage of adopting these is that it separates your structural layers, resulting in air gaps that prevent bass vibrations from going directly from the frame to the drywall and into your room, and vice versa.
You may utilize the whisper clips and channels to construct a secondary wall to get the same isolating or “floating” effect even if you’ve previously filled your wall with stiff fiberglass and used an acoustical sealant to attach drywall over it. This soundproofing method enhances the absorption of noises and vibrations, making it perfect for professional recording studios (The Pros and Cons of Whisper Clips on soundproofcentral.com).
4. Other Decoupling Techniques
| Constructing Double Walls | This allows an air gap to assist block sound and can be improved by adding insulation to the open space. |
| Isolating Layers | Creating a “floating” wall/ceiling with robust channels and robust sound clips. |
| Isolating Structure | Joist gasket tape is used to isolate studs from the floors, walls, and ceilings. |
Video: How To Soundproof A Recording Studio
Closing Air Gaps
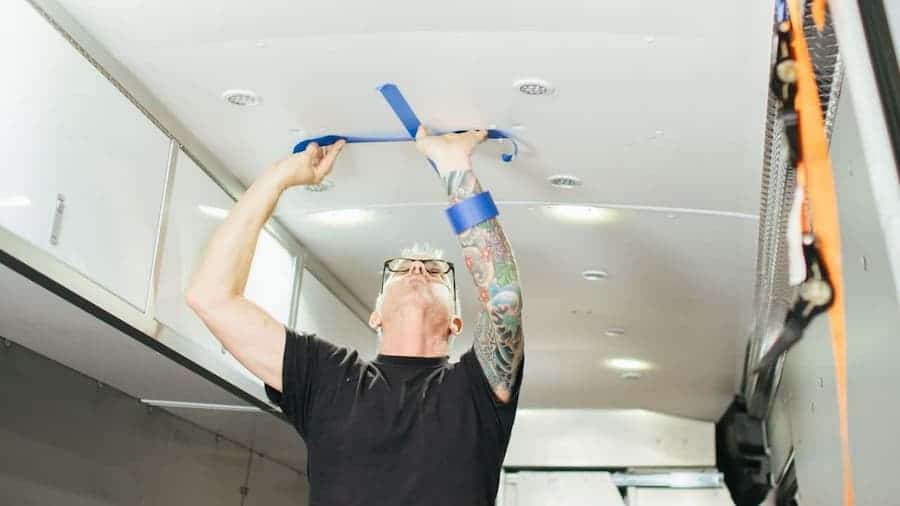
This final step may appear to be a minor annoyance, but it is truly the cherry on top. If you neglect this step, you’ll undo all of your hard work and investment in your space. The good news is that it isn’t difficult, expensive, or time-consuming. All you want to do now is go back over your hard work and fill in any air spaces or gaps that have appeared.
1. Seal the Gaps
Once you’ve identified the gaps, fill them with foam gaskets of the proper size. There are several inexpensive foam fillers that work well, but for more vibration absorption, you may load them with more insulation before sealing them up with the foam. The following are the three most frequent tools for plugging such gaps:
| Acoustical Caulk | As we said before, this can be used to cover any gaps in the room’s perimeter, as well as any small holes that may occur elsewhere. This sort of caulk stays soft and malleable over time, so no gaps will appear. |
| Foam Gaskets | These seal air gaps around electrical outlets, windows, and doors, among other things. |
| Automatic Door Bottoms | Which close the gap between the door’s bottom and the ground. Which is identical to this other solution… |
2. Install a Door Sweep
Finally, seal the space between your door and the floor. Install a more professional-looking door sweep that instantly fills the gap with rubber or uses a long, horizontal pad that can simply be placed just below your door. Any thick door insert will suffice, but one that is dense enough to effectively block out noise is ideal.
3. Other Solutions
If things are still not enough with the solutions we mentioned above, try these other solutions:
| Use a laptop stand | When laptops grow heated, the fans kick in and make a lot of noise. Using a laptop stand is a terrific method to keep your computer cool. This raises the computer off the table and allows air to circulate under it. The fan still interacts now and then, but not nearly as frequently as before. |
| Create acoustic separation | While this won’t entirely solve the issue. At the very least, creating maximum acoustic separation between your computer and mic can reduce noise to an acceptable level. |
| Get an IsoBox | The IsoBox, is a high-end rack that addresses a number of issues that ordinary studio racks overlook. It features a soundproof cage that guards against overheating with a silent cooling fan and an alarm that warns you if there are any difficulties to address the problem of computer noise. |
In Conclusion
As you can see, soundproofing in a studio needs some construction work, but there’s a bunch you can do without hiring a carpenter to limit the amount of sound that leaks into and out of a room.
It’s not difficult, and most of the work can be done by yourself. It’s just a little on the costly side. However, every money invested in a project like this will pay off in terms of the quality of your recordings thereafter. Now that you’ve finished building your soundproof studio, it’s time to have some fun and put it to use!