How to Soundproof an Air Vent
Soundproofing a room might feel like an endless process because there are several ways for sound to enter or exit every room. Even if you have soundproof your walls, windows, and doors, sound can still enter through your air vents. It seems like the sources of noise are endless!
So, how to soundproof an air vent? While you might use an air vent cover to soundproof your vent, this isn’t ideal because it restricts airflow, which misses the purpose of having air vents.


Vents are often located above a door and are frequent in areas that experience high temperatures on a regular basis. As hot air rises in a room, it will pass through the door vents, lowering the temperature. So keep reading below to learn how to soundproof your vent, including how to do so without obstructing airflow.
What Is a Flanking Noise?
Have you heard what a flanking noise is before? If not, flanking noise occurs when sound enters a room by a route other than the wall separating it from another room or the outside (more info about flanking noise on soundproofcow.com). If you are still confused here are some examples of flanking noise:
- Noises coming from the air vents, which are typically utilized to cool the room with outside air.
- Noises coming from the ductwork of the HVAC system.
- The sound travels through the doors and windows in an indirect manner.
- Noises that are transferred across floors, walls, and ceilings have all been linked.
Before we get started, let’s go through the three primary factors that affect noises from your air vents.
Factors That Affect Air Vent Noises
Before taking any action, examine the following three key factors that will affect air vent noises. The following are:
- The air vent’s shape
- Number of walls inside the vent
- The materials used to construct the air vent
To put it another way, if the interior of your vent is composed of metal, the sound will very certainly bounce off the material and cause noise. Similarly, if there aren’t many walls within the vent for the sound to bounce off of, it will freely enter the room because it won’t be absorbed.
This is related to the air vent’s shape since a duct with more corners would absorb sound better than one with a straight duct. A flexible duct with several bends, for instance, will limit the quantity of sound that enters the vent’s end (Pros and Cons of Flexible Ductwork on doityourself.com).
How to Soundproof an Air Vent
Soundproofing an air vent can be accomplished in a number of ways. We’ve included a few ways for efficiently reducing the amount of noise that travels via your vents below.
1. Create a Sound Maze
One of the most efficient soundproofing solutions for an air vent is a sound maze. A sound maze will not stop air from flowing through the vent, therefore, ventilation will not be a problem, but it will effectively silence unwanted noises. Because the maze generates many surfaces within the vent, soundwaves must bounce off of those surfaces to enter your room. We explained how sound bounces off in our previous article How to Soundproof a Studio.
As a result, there is a considerable reduction in noise. However, while it is effective, creating a sound maze is time-consuming. Likewise, you’ll need the following soundproofing materials to make a sound maze:
- Acoustic foam
- Green glue
- Measuring tape
- Plywood
- Saw


How to build a sound maze? Here are the instructions to build a sound maze in your air vent.
| Step 1 | The air vent’s cover should be removed, initially. Take a measurement of the vent’s interior. |
| Step 2 | Cut the plywood to fit within the vent, then take about a third of an inch off the end to allow air to flow around it. Create a minimum of four identical plywood pieces. |
| Step 3 | Using green glue, adhere the acoustic foam to both sides of each piece of plywood. |
| Step 4 | Apply glue to one side of the plywood piece before inserting it into the air vent, allowing approximately an inch of room between each one. The panels must be alternately attached to the inside of the vent, for instance, the first on the left side, the next on the right side, the third on the left side, and so on. |
| Step 5 | Replace the vent cover after applying acoustic foam to the rear of the air vent and securing it with green glue. |
2. Acoustic Treatment
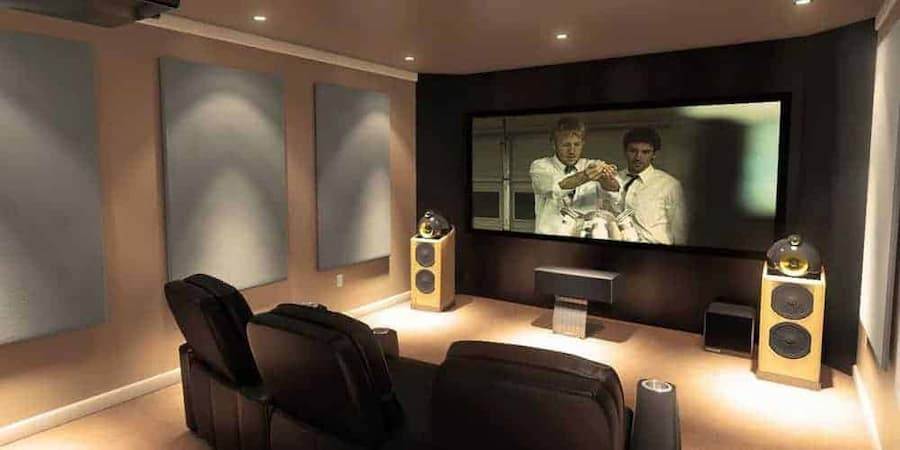
Echoes are reduced by using acoustic foam. Soundwaves bounce through the air and are picked up by the foam, preventing an echo effect. Acoustic foam is widely used in recording studios and movie theaters since it isn’t designed to block out noise, but rather to improve the sound quality in the environment (Learn how to soundproof your home theater here)
Acoustic foam can be an efficient technique to minimize the noise in air vents because these structures tend to create a lot of echoes, this is especially true if they’re made of metal. As such, this material can absorb echoes that travel through the vents, reducing the quantity of unwanted sound that enters the room you’re soundproofing.
3. Upgrade the HVAC System
If your HVAC system is old, it’s likely to be noisy, either because it’s made of old, cumbersome technology or because it’s worn down over time. It can sometimes create vibrations and absorb unwanted outside noise, which is amplified by the vent’s open area. If that’s the case, upgrade to a better, more modern HVAC system if you want to save money. Modern systems employ quieter technologies, resulting in less noise through the vent.
Modern HVAC systems also have the added benefit of being more energy-efficient, saving you money on your electricity costs! If your HVAC system isn’t too outdated, you might want to look into more solutions in this article.
Video: How to Install a New HVAC System | This Old House
4. Install Duct Liners
Installing duct liners may be a very inexpensive and straightforward way of soundproofing if you don’t want to replace the system or if there’s nothing wrong (aside from the noise) with your present HVAC system.
The sound that vibrates through the inner walls of the air vent will be absorbed by the duct liners’ insulating material. Duct liners are double-sided liners that are attached to the inside walls of the air vent. This is to keep glass wool fibers from falling into the room when the air is flowing.
5. Install Flexible Ducts
A flexible duct can minimize the amount of sound and relatively reduce the decibel that leaks from an air vent since it is bendy. Despite their sound-proofing capabilities, they should only be utilized when absolutely required! Flexible ducts work by bending the duct to reduce sound. Because sound is partially absorbed every time it reaches a curve, it is considerably more difficult for sound to move when the air is moving.
However, the disadvantage of utilizing flexible ducts is that they might have minor cracks in them, allowing sound to seep through and reducing their soundproofing effectiveness. So, they should only be used when absolutely necessary, ideally in quieter areas so that sound does not enter and pass down the duct.
Video: Installing Flexible Duct – Insulated Duct – DIY
6. Install Soffits
Sound insulating soffits are the only option to soundproof air vents and ducts that are directly exposed to sound. A typical soffit for soundproofing would be composed of MDF with a layer of insulation within. These soffits are particularly popular in home theater installations since they are quite good at reducing noise, they’re even effective at soundproofing a room for drums, like a garage!
Some home theater enthusiasts go so far as to put layers of drywall with Green Glue between the soffits. This is quite effective, but it’s only really needed in spaces that need a lot of soundproofing. When you install a flexible duct within the soffit, you’ll get a lot of bends, which will help to soundproof the air vent even more.
7. Seal the Air Vents
You may also try applying a sealer to your air vents to prevent soundwaves from passing through them. For this method, we recommend using expanding foam, since it will do a better job of filling in the gap. Seal the inside of the air vent in question with a considerable quantity of sealant. The sealant will expand to fill all of the accessible areas after it is applied.
Allow a few minutes to see whether you need to add more. There will be an airtight seal within the air vent once the sealant has dried. After that, use sandpaper to smooth up the sealant’s surface and reinstall the air vent cover.
8. Cover the Air Vents
So, perhaps you require your vents and do not like to block them because they help in keeping your room cool during the summer. In this case, finding a means to cover them with a temporary cover is an excellent choice! A soundproof blanket or noise-reducing curtains would be great. Install a curtain rail over your air vent and hang a curtain over it.
It is not necessary for the curtain to be a sound-resistant curtain; only ensure that it is thick and dense, with several layers, to assist deaden sound vibrations that pass through your vent. Keep in mind, a curtain will not prevent air from passing through your vent, but it will help to dampen sound, and when the summer months arrive, all you have to do is open your curtains to allow as much of the hot air out as possible!
Video: Elima-Draft Air Conditioner/Heater Ceiling/Wall Vent/Register Covers
In Conclusion
Because various types of noises may flow through the piping and opening, soundproofing an air vent can be a difficult task; so it is generally regarded as one of the most difficult sections of a room to soundproof.
Ultimately, when it comes to soundproofing air vents, there aren’t many easy fixes, at least not if you really want the soundproofing to be effective. This is true for many things, especially in soundproofing walls, doors, windows, and other surfaces.
Don’t be fooled by the worst soundproofing advice out there! The above-mentioned soundproofing methods for an air vent have been shown to be quite effective. You may use a combination of these methods for maximum effectiveness, or simply try each one until you discover the one that works best for you.