How to Fix a Clicking Ceiling Fan in 6 Easy Steps
If your ceiling fan is making a clicking noise, you’re not alone. Clicking ceiling fans are a common problem, but they can be fixed easily in six steps. In this blog post, we will walk you through the process of fixing a clicking ceiling fan. We’ll provide tips on how to determine what’s causing the noise and how to fix it quickly and easily. So don’t worry – your noisy ceiling fan can be fixed!
How to Fix a Clicking Ceiling Fan
Do you have a ceiling fan that is driving you crazy with annoying clicking or rattling sounds? Follow these easy steps to fixing a clicking ceiling fan and eliminate the noise for good!
If this is a DC motor-based equipment that uses a traditional, old fashioned design (not sure? Check behind), check the circuit boards on both sides to ensure they haven’t been damaged by moisture or other causes Before applying any other chemicals, make sure all dried up residue has been removed with alcohol wipes.
Caution: Before tucking in any exposed electrical wire, it’s a good idea to switch off the power at the wall switch first!
Step One: Check the blades
The first thing you should do is check the blades of your fan to make sure they are all securely attached and properly aligned. The metal brackets that connect directly to a ceiling fan’s motor are called blade irons. These blades are attached to the wooden blades. These irons, sometimes known as blade arms or blade holders, are referred to by this name.
The majority of fans have 3 to 4 screws that secure each fan blade to the blade iron. Even a little looseness of any of these screws might result in a “blade tick.”
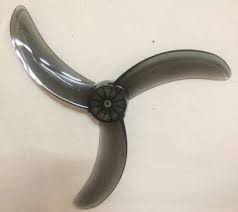 A blade tick is an intermittent clicking sound that may drive you crazy. It has no particular pattern to it, as the ticking of a clock does. It may pop once or twice, then it may pause for several seconds before coming back spastically, this can lead to anxiety and stress. It’s worse than a dripping faucet and must be nipped in the bud!
But, a blade tick is easy to fix. Just look at the top side of your blades from a ladder. There, you’ll find the blade screws that connect the blades to the blade irons. They are generally near to, but not always in contact with, the fan motor housing. All screws on each blade should be tightened as much as possible using a screwdriver. If the blade is damaged, you will need to replace it.
Step Two: Inspect the motor housing
If none of your ceiling fan blades are loose or out of alignment, then chances are that there’s something wrong with the way your fan was installed and/or maintained. One common problem occurs when a person does not install their fan properly, resulting in the motor housing shaking around while running. To fix this problem, you will need to remove all screws holding down your motor housing – look for a wire that is in touch with the motor. If you discover one, simply conceal it between the fan’s hanging bracket and the ceiling away from the motor. Spin the motor by hand to see if the clicking disappears. If so, reverse everything back in its original order.
Step Three: Check for loose wires
If there are any exposed wires from either side of your ceiling fan (or underneath), then there is a good chance that they are causing the clicking sound. To fix this problem, you should tighten up these wires with pliers or replace them altogether if necessary.
Step Four: Clean the blades
Clean out all dust particles from inside of your fan’s housing unit using compressed air canister (i.e., canned air). This will help reduce noise levels significantly!
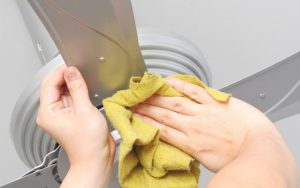
Step Five: Inspect your fan’s blades for any damage
If there is a loose blade or one that has been bent out of shape, then it may be causing the clicking sound. To fix this problem, you should purchase new replacement parts from an authorized dealer and install them. Or call in professional help if necessary!
Step Six: Check the imbalance
Remove the canopy and check for any loose screws or bolts holding your ceiling fan in place. Clicking sounds are often caused when there is an imbalance between what’s happening underneath versus above (i.e., if one blade moves faster than another). To fix this problem, make sure all screws and bolts are tight and in place. 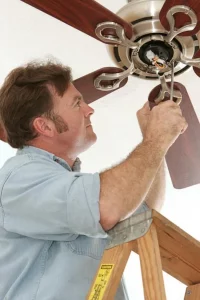
Other reasons of Clicking Sounds
Clicking sounds are often caused by poor quality materials being used on your fan unit; if this happens, consider replacing your fan all together. Additionally, make sure to keep an eye on any lubricant that is used on your ceiling fan as over time it will evaporate and may cause the clicking sound. Try reapplying a small amount of oil to the motor every few months (or contact the manufacturer for specific instructions) – this usually does the trick!
Final Remarks
Clicking sounds in your ceiling fan are not something to be ignored, so it’s best if you fix them sooner rather than later. If left unchecked, the clicking sound could lead to more serious problems down the line – like a broken fan or even damage caused by fire!
Thankfully, this issue can be easily fixed with just few simple steps. Follow our guide above and you’ll soon enjoy your fan again without any annoying noise!


