What Is A Hat Channel And How Does It Work?
If you’re a homeowner, then you know that there are always projects to be done. One of the most common tasks is leveling an uneven wall or ceiling. This can be done with a hat channel, which is a type of furring channel. In this article, we will discuss what a hat channel is and how to use it to level your walls or ceiling. Stay tuned for more home improvement tips!
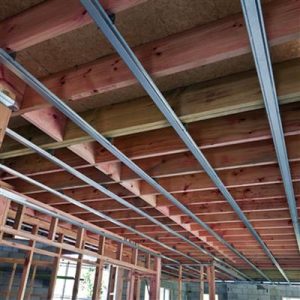
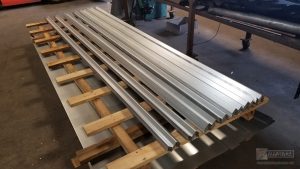
What does a Hat Channel look like?
A hat channel is a corrosion-resistant framing piece, which is used to fur out walls in masonry and ceiling projects. The hat channel is also used as a framing piece for metal studs. The hat channel is made of galvanized steel and it has a flange on one side and a groove on the other, which makes them ideal for leveling walls.
How do Hat Channels work?
Hat channels function similarly to wooden furring strips in that they create a raised, smooth, level surface on which to attach sheathing. The space created by hat channels improves the sound control performance of insulation in wall cavities from an STC of 36 to 46. Furring channels are available in standard sizes of 2700mm, 3000mm, 3600mm, 4800mm, and 6000m.
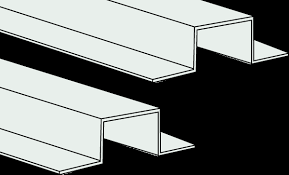
Rolled lengths of 16mm and 28 mm furring channels are also available to suit your project’s specific requirements and to save labor on site. The furring channel is typically less than 0.65 mm deep and comes in various sizes, including a 28mm wide version that provides extra spacing for thicker insulation materials.
Between the studs and drywall, a resilient channel serves as a spring. A hat channel is connected to the studs or joists through legs or brims, whereas a resilient channel attached to the framing is not. Both the furring channel or hat channel is a framing component that resists corrosion. The hat channelis manufactured in a wide range of sizes and thicknesses, and it is commonly used as a furring channel to level uneven walls or ceilings. Furring out walls or ceilings can be tricky, but with the use of a hat channel it becomes much easier.
Hat Channels and Sound Isolation
The hat channel is a framing component that resists corrosion. When used in conjunction with resilient channels, furring channels can improve the sound control performance of insulation in wall cavities from an STC of 36 to 46.
If you are having trouble leveling your walls or ceilings, using a hat channel can be a great solution. With its simple installation and easy-to-use design, anyone can fur out their walls or ceilings with ease. Try using a hat channel today!
How do I Install Furring Channels?
Furring channel installation requires two people: one person to cut out all the pieces needed and another person who will help secure them into place using nails or screws (make sure you have an electric drill). First, identify where you want to install the hat channel and mark it on the wall or ceiling. Then use a level to draw a line between the two marks.
Once you have your line drawn, use a drill to make starter holes along the line. These will act as guides for your saw blade when you cut the channel. Saw along the lines that you drew using a hacksaw or power saw.

After you have cut the channels to size, use a drill to make pilot holes in each end of the channel. These pilot holes will help with the installation of your screws.
Finally, install the hat channel by screwing it into place using a power drill or screwdriver. Make sure that it is level before you move on to installing your drywall.
Can you use Drywall Screws for Hat Channels?
Drywall screws can be used with hat channels, but they are not designed for this purpose. Drywall screws work well in wood and sheet metal applications, but they will not hold up to the pressure of a stud or joist. The head on drywall screws is also wider than that of most other types, which makes them unsuitable as fasteners for furring strips when there is insufficient clearance between framing members.
Tackle your Home Improvements!
Thank you for sticking with us throughout this article on hat channels. We hope that you have learned a lot and are now ready to tackle your home improvement projects with ease! If you have any questions, please don’t hesitate to reach out to us. And be sure to stay tuned for more helpful tips in the future. Thanks again for reading!

